Wednesday, September 14, 2016

Update Motorola Moto E LTE X1527 to Android 7.0 Nougat via AOSP ROM

Right from the release of Android 7.0 Nougat OS, we have been witnessing some Custom ROM in play, Many devices that are yet to receive its updates of Android 7.0 Nougat ROM have already gotten its AOSP ROM and i believe the users of this smartphone are actually enjoying  the fascinating features of Android 7.0 Nougat. You might be surprised as why many Smartphone users are eager to lay their hands on the Android 7.0 Nougat, believe you won't know till you check out this amazing features of Android 7.0 Nougat.

The unofficial AOSP Android 7.0 Nougat ROM is now available for Moto E LTE XT1527 (2nd Gen.) code named Surnai. We are sharing step by step guide to Download & Install Android 7.0 Nougat AOSP ROM On Moto E 2nd Gen 2015. Follow the given steps to Update your Moto E 2nd Gen to Android 7.0 Nougat Via AOSP ROM.

Well i know some users are still blind to what AOSP ROM means in relation to the original Updates that comes through OTA.

What is AOSP ROM?

AOSP ROM is an acronym for Android Open Source Project and it actually means an unmodified ROMs or code from Google. AOSP ROM are Customs ROM but the term "Custom ROM" does not mean that its customized ROM in general, it is a term that specifically refers to ROMs that have been customized by third parties i.e. not the Manufacturers or Carriers.

AOSP ROM are also the Stock ROM (Default Android ROM) that have been customized to remove some of the Manufacturers/Carriers Tweak and make them closer to an uncustomized ROM ( a ROM with zero customization). Learn More

since you already know what AOSP ROM means now lets proceed on how to install it on Xiaomi Devices. 

It is very unlikely that Moto E 2nd gen is going to get official Nougat 7.0 update officially or not. But that doesn’t mean that Moto E 2nd gen users can’t experience the latest Android 7.0 Nougat. Now unofficial Nougat 7.0 ROM available for the device. This is a great news for all Moto G 2nd Gen LTE users who want to experience the latest Android on their devices. Follow the given steps carefully to Download & Install Android 7.0 Nougat AOSP ROM On Moto E 2nd Gen (LTE)

Special thanks to srfarias XDA Senior Member  for sharing the initial build of Android 7.0 AOSP ROM for Moto E LTE XT1527. According to the dev, this method only works on Moto E LTE XT1527 with TWRP installed on it. So make sure that, your Moto E 2015 has TWRP then follow the given guide to Download & Install Android 7.0 Nougat AOSP ROM On Moto E 2nd Gen. This will Update Moto E 2nd Gen to Android 7.0 Nougat.

As you guys know, Moto E 2nd is very unlike to get the Android 7.0 Nougat Update officially, so users have only one option and that is custom ROMs. This AOSP ROM is in its beta stage so there are many bugs and can’t be used as a daily driver right now. But in future updates, the bugs will be fixed.

Disclaimer

www.wikiban.com will not be held responsible for any damage occurred to your device in the process of following this tutorial. Do it at your own risk.

Requirements

  • Make sure there is at least 60% battery left on your smartphone before begin.
  • Make sure you have a custom recovery (TWRP/CWM) Install On your device. We recommend TWRP Recovery. Here is How to install
  • Now from TWRP Recovery =Take a proper Nandroid backup so that you can restore anytime you need.

how to install android 7.0 nougat on moto e 2ng gen lte

Download 


Download the right ROM according to your device’s name and model number

HOW TO FLASH/INSTALL ANDROID 7.0 NOUGAT AOSP ROM ON Moto E 2nd Gen (LTE)

  • First, download all the files From the download section above
  • Now connect your device to the PC and transfer the ROM, and Gapps to the internal memory of your device (remember the location)
  • Now boot your device into recovery mode.
  • Now follow this guide to Flash Android 7.0 Nougat AOSP ROM On Moto E 2nd Gen (LTE)How To Install A Custom ROM Via Recovery On Any Android
  • After Flashing the ROM, now Flash the Gapps. [Guide]  How To Flash Gapps Using TWRP Recovery
  • Done!!! Now reboot your device from TWRP recovery (TWRP Recovery main menu >> Reboot System)
  • Your Moto E 2nd Gen (LTE)  should be updated to Android 7.0 Nougat.
via
 
If you encounter any problem in the process, feel free to let us know via the comment box below

If you dont want to miss any of our latest update you can subscribe here with your email address or you can follow us on facebook to get the latest updates about tech and more.
 

Don't forget Share.

Update Sony Xperia L to Android 7.0 Nougat via AOSP ROM

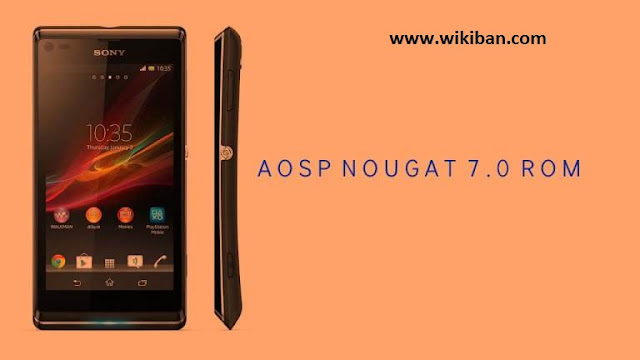
Now unofficial Android 7.0 Nougat AOSP ROM available for Sony Xperia L. Follow this step by step guide to Download & Install Android 7.0 Nougat AOSP ROM On Xperia L. Follow the given steps to Update Xperia L to Android 7.0 Nougat Via AOSP Custom ROM.

Right from the release of Android 7.0 Nougat OS, we have been witnessing some Custom ROM in play, Many devices that are yet to receive its updates of Android 7.0 Nougat ROM have already gotten its AOSP ROM and i believe the users of this smartphone are actually enjoying  the fascinating features of Android 7.0 Nougat. You might be surprised as why many Smartphone users are eager to lay their hands on the Android 7.0 Nougat, believe you won't know till you check out this amazing features of Android 7.0 Nougat.

Well i know some users are still blind to what AOSP ROM means in relation to the original Updates that comes through OTA.

What is AOSP ROM?

AOSP ROM is an acronym for Android Open Source Project and it actually means an unmodified ROMs or code from Google. AOSP ROM are Customs ROM but the term "Custom ROM" does not mean that its customized ROM in general, it is a term that specifically refers to ROMs that have been customized by third parties i.e. not the Manufacturers or Carriers.

AOSP ROM are also the Stock ROM (Default Android ROM) that have been customized to remove some of the Manufacturers/Carriers Tweak and make them closer to an uncustomized ROM ( a ROM with zero customization). Learn More

since you already know what AOSP ROM means now lets proceed on how to install it on Xiaomi Devices. 

Most of the Sony Xperia devices have received AOSP 7.0 Nougat ROM and the latest entry is Xperia L. Previously, Xperia Z1 has received the unofficial Nougat ROM There are unofficial Nougat ROMs available for Some Xperia devices, Google Nexus 5, Nexus 6. This is a great news for all Xperia L users who want to experience the latest Android Nougat 7.0 on their devices. Follow the given steps carefully to Download & Install Android 7.0 Nougat AOSP ROM On Xperia L.

Very special thanks to  XDA developer Agent-Fabulous for releasing the initial build of Android 7.0 AOSP ROM for Xperia L. This method only works on Xperia L with TWRP installed on it. So make sure that, your Xperia L has TWRP then follow the given guide to Download & Install Android 7.0 Nougat AOSP ROM On Xperia L, This will Update Xiaomi Xperia L to Android 7.0 Nougat.

Disclaimer

www.wikiban.com will not be held responsible for any damage occurred to your device in the process of following this tutorial. Do it at your own risk.

Requirements

  • Make sure there is at least 60% battery left on your smartphone before begin.
  • Make sure you have a custom recovery (TWRP/CWM) Install On your device. We recommend TWRP Recovery. Here is How to install
  • Now from TWRP Recovery =Take a proper Nandroid backup so that you can restore anytime you need.

update xperia l to android 7 nougat

Download 


Download the right ROM according to your device’s name and model number

HOW TO FLASH/INSTALL ANDROID 7.0 NOUGAT AOSP ROM ON Xperia L

  • First, download all the files From the download section above
  • Now connect your device to the PC and transfer the ROM, and Gapps to the internal memory of your device (remember the location)
  • Now boot your device into recovery mode.
  • Now follow this guide to Flash Android 7.0 Nougat AOSP ROM On Xperia LHow To Install A Custom ROM Via Recovery On Any Android
  • After Flashing the ROM, now Flash the Gapps. [Guide]  How To Flash Gapps Using TWRP Recovery
  • Done!!! Now reboot your device from TWRP recovery (TWRP Recovery main menu >> Reboot System)
  • Your Xperia L  should be updated to Android 7.0 Nougat.
via
 
If you encounter any problem in the process, feel free to let us know via the comment box below

If you dont want to miss any of our latest update you can subscribe here with your email address or you can follow us on facebook to get the latest updates about tech and more.
 

Don't forget Share.

Monday, September 12, 2016

Happy Sallah: Get Free Airtel 100MB or 200MB to Browse all Day

For those that have already started eating their ram meat, and those that have been waiting for their turn to arrive, let me use this medium on behalf of the entire www.wikiban.com team we wish you a successful Eid-AL-ADHA Celebration and we hope you can witness more in the upcoming next years, lol. 

If you Celebrating this Sallah felicitation without data i can confidently say your really missing a lot of latest updates and so many exciting programs and events that is taking place online. We at www.wikiban.com always want to make sure that our readers surf the internet easily more especially at this time where is everybody is excising some training using his molars and premolars teeth, lol.

Let me use this platform to show you guys how you can easily grab your free airtel 100MB or 200MB easily without tweaking or connecting something.

this trick is not new as some are actually aware of it while some are new to it... well let me not disturb you with much noise and lets get to the point..

How to Get Free Airtel 100MB or 200MB or 50MB

  • The data is usable on every phone that is capable of accessing the internet including PC
  • The data is not available to all subscribers but some selected subscribers
  • You need  to have zero balance in your account
  • For 200MB dial *141*13*200#
  • For 100MB dial *141*13*100#
  • For 50MB dial *141*13*50#
  • Check balance using *140# or *885*0#
  • It will power all your android apps

get free 100mb or 200mb data from aortel

    Drop your testimony below if you are among the luckiest subscribers


    If you dont want to miss any of our latest update you can subscribe here with your email address or you can follow us on facebook to get the latest updates about tech and more.
     

    Don't forget Share.

    Message Centre Number For MTN, Airtel, Glo & Etisalat Plus How to Set it up

    You might be hearing message centre number but you don't know what is actually mean or you don't know how you can access it or otherwise you don't even how it functions. This article will explain it to you what is message centre is number and how it works. it is imperative for you to know that any kind of device that sends or receive message has something called Short Message Service Centre (SMSC) Number that regulates SMS service operation on your phone.

    The Short Message Service Centre (SMSC) Number needs to be set correctly in your phone so it can send text messages. If you accidently change or delete it on your mobile phone, you’ll no longer be able to send sms. You will likely be getting “message sending” failed error whenever you try to send text messages on the phone.

    What is Message Centre Number?

    Short Message Service Centre (SMSC) Number is responsible for delivering the SMS text messages of a mobile network through your mobile phone. Typically an SMSC address is an ordinary mobile phone number in the international format.

    When an SMS message is sent from a mobile phone, it will reach an SMS Service Centre first. The SMS centre then forwards the SMS message towards the destination mobile network. An SMS message may need to pass through more than one network entity (e.g. SMSC and SMS gateway) before reaching the mobile phone.

    The main duty of an SMSC is to route SMS messages and regulate the process. If the recipient is unavailable (for example, when the mobile phone is switched off), the SMSC will store the SMS message. It will forward the SMS message when the recipient is available.

    To be able to send SMS from your Mobile (Cell) phone you must first know the address of the mobile network operator’s SMSC. Normally, the SMSC address is pre-set in the SIM card by the mobile network operator, which means you do not need to make any changes to it, unless you want to use FREE SMSC’s.

    Message Centre Number for MTN, Airtel, Glo & Etisalat

    If for any reason your message center number has been edited or deleted, please find below, the correct values for Glo, Etisalat, Airtel and MTN Nigeria Message Centre Numbers:
    1. MTN Message center Number : +234803000000
    2. Etisalat Message Center Number : +2348090001518
    3. Airtel Message Center Number : +2348020000009
    4. Glo Message Centre Number : +2348050001501

    How to Configure Message Centre Number on your Phone

    For Android Users..

    In most Androids, it can be located in Messages > Option / Settings > Text Message Setting.

    On some Dual SIM Androids, you can set the SMSC for both networks.


    For Iphone Users..

    On iPhone, you can check your message centre number by dialing *#5005*7672#
    If you are using MTN on your iPhone, and the ‘Service Centre Address’ isn’t +234803000000, dial **5005*7672*+234803000000# to set it to the correct MTN Message Centre Number.

    For Other Phones..

    Just go to your message setting and look for the Message Centre Number or Service Provide Centre Number as the case may be and edit it to the correct one.

    Recommended: How to Activate Airtime Transfer on MTN, Airtel, Glo & Etisalat

    If you dont want to miss any of our latest update you can subscribe here with your email address or you can follow us on facebook to get the latest updates about tech and more.
     

    Don't forget Share.

    Sunday, September 11, 2016

    Websites Without HTTPS (SSL Certificates) to be Flagged by Google Chrome From January 2017

    Google will start to downgrade HTTP sites on its Chrome browser from January 2017 by marking them out as less secure in a bid to stop people visiting sites run by crooks and scammers.

    The move means that legitimate website operators without HTTPS websites need to act. Google has long hinted at such a move so it should not come as a huge surprise.

    "To help users browse the web safely, Chrome indicates connection security with an icon in the address bar. Historically, Chrome has not explicitly labelled HTTP connections as non-secure," said Emily Schechter from the Chrome Security team in a blog post.

    "Beginning in January 2017 (Chrome 56), we'll mark HTTP sites that transmit passwords or credit cards as non-secure, as part of a long-term plan to mark all HTTP sites as non-secure.
    http site to be flag by google chrome


    "A substantial portion of web traffic has transitioned to HTTPS so far, and HTTPS use is consistently increasing. We recently hit a milestone with more than half of Chrome desktop page loads now served over HTTPS.

    "In addition, since the time we released our HTTPS report in February, 12 more of the top 100 websites have changed their serving default from HTTP to HTTPS."

    Google is very keen on this sort of thing, and recently applied the HTTPS padlock sign to Gmail.

    "Studies show that users do not perceive the lack of a 'secure' icon as a warning and become blind to warnings that occur too frequently. Our plan to label HTTP sites more clearly and accurately as non-secure will take place in gradual steps, based on increasingly stringent criteria," said Schechter.

    "Chrome 56 will label HTTP pages with password or credit card form fields as not secure, given their particularly sensitive nature.

    "In following releases, we will continue to extend HTTP warnings, for example, by labelling HTTP pages as ‘not secure' in Incognito mode, where users may have higher expectations of privacy.

    "Eventually, we plan to label all HTTP pages as non-secure, and change the HTTP security indicator to the red triangle that we use for broken HTTPS."


    If you dont want to miss any of our latest update you can subscribe here with your email address or you can follow us on facebook to get the latest updates about tech and more.
     

    Don't forget Share.

    Saturday, September 10, 2016

    Updating Your AT&T LG G2 to Android 7.0 Nougat via AOSP ROM (D800)

    Right from the release of Android 7.0 Nougat OS, we have been witnessing some Custom ROM in play, Many devices that are yet to receive its updates of Android 7.0 Nougat ROM have already gotten its AOSP ROM and i believe the users of this smartphone are actually enjoying  the fascinating features of Android 7.0 Nougat. You might be surprised as why many Smartphone users are eager to lay their hands on the Android 7.0 Nougat, believe you won't know till you check out this amazing features of Android 7.0 Nougat.

    Now unofficial AOSP Nougat 7.0 available for AT&T LG G2 (D800). We are sharing step by step guide to Download & Install Android 7.0 Nougat AOSP ROM On AT&T LG G2. Follow the given steps to Update your AT&T Lg G2 to Android 7.0 Nougat Via AOSP ROM.

    Well i know some users are still blind to what AOSP ROM means in relation to the original Updates that comes through OTA.

    What is AOSP ROM?

    AOSP ROM is an acronym for Android Open Source Project and it actually means an unmodified ROMs or code from Google. AOSP ROM are Customs ROM but the term "Custom ROM" does not mean that its customized ROM in general, it is a term that specifically refers to ROMs that have been customized by third parties i.e. not the Manufacturers or Carriers.

    AOSP ROM are also the Stock ROM (Default Android ROM) that have been customized to remove some of the Manufacturers/Carriers Tweak and make them closer to an uncustomized ROM ( a ROM with zero customization). Learn More

    since you already know what AOSP ROM means now lets proceed on how to install it on your Devices. 

    AT&T LG G2 having model number D800 is the latest LG device to get the unofficial AOSP Nougat 7.0 ROM. There are unofficial Nougat ROMs available for LG G3, Xperia devices, Google Nexus 5, Nexus 6. This is a great news for all LG G2 D800users who want to experience the latest Android Nougat 7.0 on their devices. Follow the given steps carefully to Download & Install Android 7.0 Nougat AOSP ROM On AT&T LG G2.

    Special thanks to  XDA Senior Member xdahero1 for sharing the initial build of Android 7.0 AOSP ROM for AT&T LG G2 D800. According to the dev, this method only works on LG G2 D800/802 with TWRP installed on it. So make sure that, your LG G2 has TWRP then follow the given guide to Download & Install Android 7.0 Nougat AOSP ROM On AT&T LG G2. This will Update AT&T LG G2 to Android 7.0 Nougat.

    As you guys know, LG G2 is not going to get the Android 7.0 Nougat Update officially, so users you have only one option and that is custom ROMs. This AOSP ROM is in its beta stage so there are many bugs and can’t be used as a daily driver right now. But in future updates the bugs will be fixed.

    Disclaimer

    www.wikiban.com will not be held responsible for any damage occurred to your device in the process of following this tutorial. Do it at your own risk.

    Requirements

    • Make sure there is at least 60% battery left on your smartphone before begin.
    • Make sure you have a custom recovery (TWRP/CWM) Install On your device. We recommend TWRP Recovery. Here is How to install
    • Now from TWRP Recovery =Take a proper Nandroid backup so that you can restore anytime you need.

    update your lg g2 to android 7.0 nougat d800

      Download 


      Download the right ROM according to your device’s name and model number

      HOW TO FLASH/INSTALL ANDROID 7.0 NOUGAT AOSP ROM ON LG G2

      • First, download all the files From the download section above
      • Now connect your device to the PC and transfer the ROM, and Gapps to the internal memory of your device (remember the location)
      • Now boot your device into recovery mode.
      • Now follow this guide to Flash Android 7.0 Nougat AOSP ROM On LG G2How To Install A Custom ROM Via Recovery On Any Android
      • After Flashing the ROM, now Flash the Gapps. [Guide]  How To Flash Gapps Using TWRP Recovery
      • Done!!! Now reboot your device from TWRP recovery (TWRP Recovery main menu >> Reboot System)
      • Your LG G2  should be updated to Android 7.0 Nougat.
      via
       
      If you encounter any problem in the process, feel free to let us know via the comment box below

      If you dont want to miss any of our latest update you can subscribe here with your email address or you can follow us on facebook to get the latest updates about tech and more.
       

      Don't forget Share.

      How to Update LG G3 to Android 7.0 Nougat via AOSP ROM (D850, D855, D851)

      Right from the release of Android 7.0 Nougat OS, we have been witnessing some Custom ROM in play, Many devices that are yet to receive its updates of Android 7.0 Nougat ROM have already gotten its AOSP ROM and i believe the users of this smartphone are actually enjoying  the fascinating features of Android 7.0 Nougat. You might be surprised as why many Smartphone users are eager to lay their hands on the Android 7.0 Nougat, believe you won't know till you check out this amazing features of Android 7.0 Nougat.

      Now unofficial AOSP Nougat 7.0 available for LG G3 (D850, D855 and D851). We are sharing step by step guide to Download & Install Android 7.0 Nougat AOSP ROM On Lg G3. Follow the given steps below to Update LG G3 to Android 7.0 Nougat Via AOSP ROM

      Well i know some users are still blind to what AOSP ROM means in relation to the original Updates that comes through OTA.

      What is AOSP ROM?

      AOSP ROM is an acronym for Android Open Source Project and it actually means an unmodified ROMs or code from Google. AOSP ROM are Customs ROM but the term "Custom ROM" does not mean that its customized ROM in general, it is a term that specifically refers to ROMs that have been customized by third parties i.e. not the Manufacturers or Carriers.

      AOSP ROM are also the Stock ROM (Default Android ROM) that have been customized to remove some of the Manufacturers/Carriers Tweak and make them closer to an uncustomized ROM ( a ROM with zero customization). Learn More

      since you already know what AOSP ROM means now lets proceed on how to install it on your Devices. 

      LG G3 with the model number D850, D855 and D851 become the first LG device to get the unofficial AOSP Nougat 7.0 ROM. There are unofficial Nougat ROMs available for Some Xperia devices, Google Nexus 5, Nexus 6. This is a great news for all LG G3 users who want to experience the latest Android Nougat 7.0 on their devices. Follow the given steps carefully to Download & Install Android 7.0 Nougat AOSP ROM On LG G3.
      Special thanks to  XDA Senior Member bangprovn for sharing the initial build of Android 7.0 AOSP ROM for LG G3 D850. This method only works on LG G3 D850/851/855 with TWRP installed on it. So make sure that, your LG G3 has TWRP then follow the given guide to Download & Install Android 7.0 Nougat AOSP ROM On LG G3. This will Update LG G3 to Android 7.0 Nougat.

      As you guys know, LG G3 is not going to get the Android 7.0 Nougat Update officially, so users have only one option and that is custom ROMs. This AOSP ROM is in its beta stage so there are many bugs and can’t be used as daily driver right now.


      Disclaimer

      www.wikiban.com will not be held responsible for any damage occurred to your device in the process of following this tutorial. Do it at your own risk.

      Requirements

      • Make sure there is at least 60% battery left on your smartphone before begin.
      • Make sure you have a custom recovery (TWRP/CWM) Install On your device. We recommend TWRP Recovery. Here is How to install
      • Now from TWRP Recovery =Take a proper Nandroid backup so that you can restore anytime you need.

      update lg g3 to android 7.0 nougat aosp rom

      Download 


      Download the right ROM according to your device’s name and model number

      HOW TO FLASH/INSTALL ANDROID 7.0 NOUGAT AOSP ROM ON LG G3

      • First, download all the files From the download section above
      • Now connect your device to the PC and transfer the ROM, and Gapps to the internal memory of your device (remember the location)
      • Now boot your device into recovery mode.
      • Now follow this guide to Flash Android 7.0 Nougat AOSP ROM On LG G3How To Install A Custom ROM Via Recovery On Any Android
      • After Flashing the ROM, now Flash the Gapps. [Guide]  How To Flash Gapps Using TWRP Recovery
      • Done!!! Now reboot your device from TWRP recovery (TWRP Recovery main menu >> Reboot System)
      • Your LG G3  should be updated to Android 7.0 Nougat.
      Note : If you have LG G3 D855 then you need kernel and script from here

      Related: How to update LG G2 to Android 7.0 Nougat 

      via
       
      If you encounter any problem in the process, feel free to let us know via the comment box below

      If you dont want to miss any of our latest update you can subscribe here with your email address or you can follow us on facebook to get the latest updates about tech and more.
       

      Don't forget Share.

      How to Download & Install Android 7.0 Nougat AOSP ROM on Sony Xperia Z Ultra C6833

      Right from the release of Android 7.0 Nougat OS, we have been witnessing some Custom ROM in play, Many devices that are yet to receive its updates of Android 7.0 Nougat ROM have already gotten its AOSP ROM and i believe the users of this smartphone are actually enjoying  the fascinating features of Android 7.0 Nougat. You might be surprised as why many Smartphone users are eager to lay their hands on the Android 7.0 Nougat, believe you won't know till you check out this amazing features of Android 7.0 Nougat.

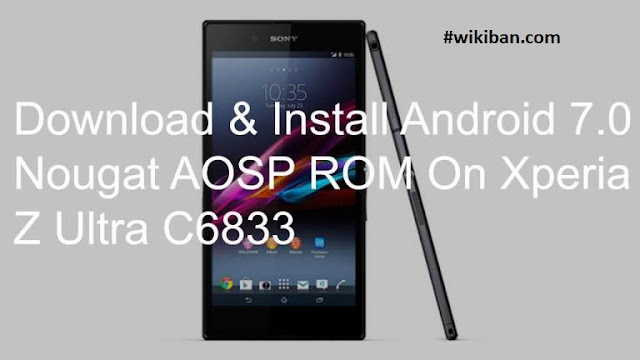
      Sony Xperia Z Ultra C6833 gets android 7.0 Nougat Update with unofficial AOSP ROM. Follow this step by step guide to Download & Install Android 7.0 Nougat AOSP ROM On Xperia Z Ultra C6833. Follow the given steps to Update Xperia Z Ultra C6833 to Android 7.0 Nougat Via AOSP Custom ROM.

      Well i know some users are still blind to what AOSP ROM means in relation to the original Updates that comes through OTA.

      What is AOSP ROM?

      AOSP ROM is an acronym for Android Open Source Project and it actually means an unmodified ROMs or code from Google. AOSP ROM are Customs ROM but the term "Custom ROM" does not mean that its customized ROM in general, it is a term that specifically refers to ROMs that have been customized by third parties i.e. not the Manufacturers or Carriers.

      AOSP ROM are also the Stock ROM (Default Android ROM) that have been customized to remove some of the Manufacturers/Carriers Tweak and make them closer to an uncustomized ROM ( a ROM with zero customization). Learn More

      since you already know what AOSP ROM means now lets proceed on how to install it on your Devices. 

      Xperia Z ultra becomes the latest Xperia device to get the unofficial AOSP Nougat 7.0 ROM. Previously, Xperia Z1 has received the unofficial Nougat ROM. There are unofficial Nougat ROMs available for Some Xperia devices, Google Nexus 5, Nexus 6. This is a great news for all Xperia Z Ultra C6833 users who want to experience the latest Android Nougat 7.0 on their devices. Follow the given steps carefully to Download & Install Android 7.0 Nougat AOSP ROM On Xperia Z Ultra C6833.

      Very special thanks to  XDA developer matze19999 for releasing the initial build of Android 7.0 AOSP ROM for Xperia Z Ultra C6833. This method only works on Xperia Z Ultra C6833 Codenamed Togari with TWRP installed on it. So make sure that, your Xperia Z Ultra has TWRP then follow the given guide to Download & Install Android 7.0 Nougat AOSP ROM On Xperia Z Ultra C6833, This will Update Xperia Z Ultra C6833 to Android 7.0 Nougat.

      Disclaimer

      www.wikiban.com will not be held responsible for any damage occurred to your device in the process of following this tutorial. Do it at your own risk.

      Requirements

      • Make sure there is at least 60% battery left on your smartphone before begin.
      • Make sure you have a custom recovery (TWRP/CWM) Install On your device. We recommend TWRP Recovery. Here is How to install
      • Now from TWRP Recovery =Take a proper Nandroid backup so that you can restore anytime you need.

      download & Install Sony Xperia Z Ultra C6833 Android 7.0 Nougat AOSP ROM

        Download 


        Download the right ROM according to your device’s name and model number

        HOW TO FLASH/INSTALL ANDROID 7.0 NOUGAT AOSP ROM ON Xperia Z Ultra

        • First, download all the files From the download section above
        • Now connect your device to the PC and transfer the ROM, and Gapps to the internal memory of your device (remember the location)
        • Now boot your device into recovery mode.
        • Now follow this guide to Flash Android 7.0 Nougat AOSP ROM On Sony Xperia Z ultraHow To Install A Custom ROM Via Recovery On Any Android
        • After Flashing the ROM, now Flash the Gapps. [Guide]  How To Flash Gapps Using TWRP Recovery
        • Done!!! Now reboot your device from TWRP recovery (TWRP Recovery main menu >> Reboot System)
        • Your Xperia Z Ultra should be updated to Android 7.0 Nougat.
        via
         
        If you encounter any problem in the process, feel free to let us know via the comment box below

        If you dont want to miss any of our latest update you can subscribe here with your email address or you can follow us on facebook to get the latest updates about tech and more.
         

        Don't forget Share.

        How to Download & Install Android 7.0 Nougat AOSP ROM on Samsung Galaxy S2 plus 19105

        Right from the release of Android 7.0 Nougat OS, we have been witnessing some Custom ROM in play, Many devices that are yet to receive its updates of Android 7.0 Nougat ROM have already gotten its AOSP ROM and i believe the users of this smartphone are actually enjoying  the fascinating features of Android 7.0 Nougat. You might be surprised as why many Smartphone users are eager to lay their hands on the Android 7.0 Nougat, believe you won't know till you check out this amazing features of Android 7.0 Nougat.

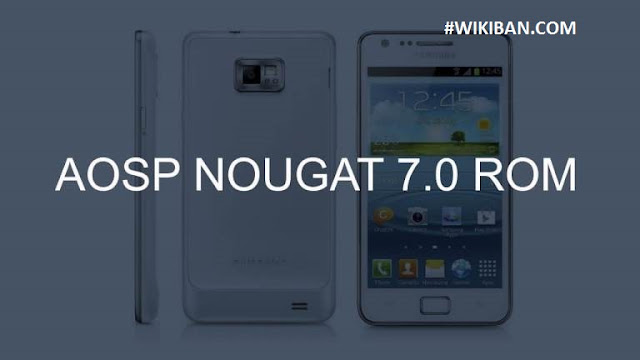
        Android 7.0 Nougat Unofficial AOSP ROM is now available for Samsung Galaxy S2 Plus I9105. Here we will be sharing step by step guide to Download & Install Android 7.0 Nougat AOSP ROM On Galaxy S2 Plus I9105. Follow the given steps to Update Samsung Galaxy S2 Plus I9105  to Android 7.0 Nougat Via AOSP.

        Well i know some users are still blind to what AOSP ROM means in relation to the original Updates that comes through OTA.

        What is AOSP ROM?

        AOSP ROM is an acronym for Android Open Source Project and it actually means an unmodified ROMs or code from Google. AOSP ROM are Customs ROM but the term "Custom ROM" does not mean that its customized ROM in general, it is a term that specifically refers to ROMs that have been customized by third parties i.e. not the Manufacturers or Carriers.

        AOSP ROM are also the Stock ROM (Default Android ROM) that have been customized to remove some of the Manufacturers/Carriers Tweak and make them closer to an uncustomized ROM ( a ROM with zero customization). Learn More

        since you already know what AOSP ROM means now lets proceed on how to install it on S2 Plus 19105

        Samsung galaxy S2 Plus is a very old device and we all know that it is not going to get the official Android Nougat 7.0 OTA Update. Users have to install custom ROMs to update S2 plus to latest Android. The great thing about android is that you can flash custom ROMs. This is a great news for all Galaxy S2 Plus users who want to experience the latest Android on their devices. Follow the given steps carefully to Download & Install Android 7.0 Nougat AOSP ROM On Galaxy S2 Plus

        Very special thanks to  XDA developer Carlos_Manuel for releasing the initial build of Android 7.0 AOSP ROM for Galaxy S2 Plus I9105. This method only works on Galaxy S2 Plus I9105 international variant with TWRP installed on it. So make sure that, your Galaxy S2 Plus I9105 has TWRP then follow the given guide to Download & Install Android 7.0 Nougat AOSP ROM On Samsung Galaxy S2 Plus I9105, This will Update Galaxy S2 Plus I9105 to Android 7.0 Nougat.

        Disclaimer

        www.wikiban.com will not be held responsible for any damage occurred to your device in the process of following this tutorial. Do it at your own risk.

        Requirements

        • Make sure there is at least 60% battery left on your smartphone before begin.
        • Make sure you have a custom recovery (TWRP/CWM) Install On your device. We recommend TWRP Recovery. Here is How to install
        • Now from TWRP Recovery =Take a proper Nandroid backup so that you can restore anytime you need.

        how to install aosp rom on samsung galaxy s2 plus

        Download 


        Download the right ROM according to your device’s name and model number

        HOW TO FLASH/INSTALL ANDROID 7.0 NOUGAT AOSP ROM ON Galaxy S2 Plus 19105

        • First, download all the files From the download section above
        • Now connect your device to the PC and transfer the ROM, and Gapps to the internal memory of your device (remember the location)
        • Now boot your device into recovery mode.
        • Now follow this guide to Flash Android 7.0 Nougat AOSP ROM On Samsung Galaxy S2How To Install A Custom ROM Via Recovery On Any Android
        • After Flashing the ROM, now Flash the Gapps. [Guide]  How To Flash Gapps Using TWRP Recovery
        • Done!!! Now reboot your device from TWRP recovery (TWRP Recovery main menu >> Reboot System)
        • Your Samsung Galaxy S2 Plus should be updated to Android 7.0 Nougat.
        via
         
        If you encounter any problem in the process, feel free to let us know via the comment box below

        If you dont want to miss any of our latest update you can subscribe here with your email address or you can follow us on facebook to get the latest updates about tech and more.
         

        Don't forget Share.

        How to Download & Install Android 7.0 Nougat AOSP ROM for Xiaomi Mi 3 and Mi 4

        Right from the release of Android 7.0 Nougat OS, we have been witnessing some Custom ROM in play, Many devices that are yet to receive its updates of Android 7.0 Nougat ROM have already gotten its AOSP ROM and i believe the users of this smartphone are actually enjoying  the fascinating features of Android 7.0 Nougat. You might be surprised as why many Smartphone users are eager to lay their hands on the Android 7.0 Nougat, believe you won't know till you check out this amazing features of Android 7.0 Nougat.

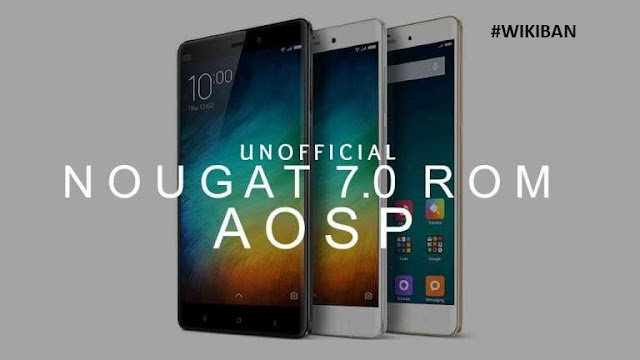
        Xiaomi Mi 3 and Mi 4 get’s their first unofficial  Android 7.0 Nougat AOSP ROM. Here We will be sharing step by step guide to Download & Install Android 7.0 Nougat AOSP ROM On Xiaomi Mi3 and Mi4. Follow the given steps to Update Xiaomi Mi3/Mi4 to Android 7.0 Nougat Via AOSP Custom ROM.

        Well i know some users are still blind to what AOSP ROM means in relation to the original Updates that comes through OTA.

        What is AOSP ROM?

        AOSP ROM is an acronym for Android Open Source Project and it actually means an unmodified ROMs or code from Google. AOSP ROM are Customs ROM but the term "Custom ROM" does not mean that its customized ROM in general, it is a term that specifically refers to ROMs that have been customized by third parties i.e. not the Manufacturers or Carriers.

        AOSP ROM is also the Stock ROM (Default Android ROM) that have been customized to remove some of the Manufacturers/Carriers Tweak and make them closer to an uncustomized ROM ( a ROM with zero customization). Learn More

        since you already know what AOSP ROM means now lets proceed on how to install it on Xiaomi Devices. 

        Xiaomi Mi3 and Mi4 becomes the first Xiaomi devices to get android Nougat 7.0 ROM. There are unofficial Nougat ROMs available for Some Xperia devices, Google Nexus 5, Nexus 6. This is a great news for all Xiaomi Mi3 and Mi4 users who want to experience the latest Android Nougat 7.0 on their devices. Follow the given steps carefully to Download & Install Android 7.0 Nougat AOSP ROM On Xiaomi Mi3 and Mi4.

        Very special thanks to  XDA developer vasishath for releasing the initial build of Android 7.0 AOSP ROM for Xiaomi Mi3 and Mi4. This method only works on Mi3/Mi4 with TWRP installed on it. So make sure that, your Mi3/Mi4 has TWRP then follow the given guide to Download & Install Android 7.0 Nougat AOSP ROM On Xiaomi Mi3 and Mi4, This will Update Xiaomi Mi3/Mi4 to Android 7.0 Nougat.

        Disclaimer

        www.wikiban.com will not be held responsible for any damage occurred to your device in the process of following this tutorial. Do it at your own risk.

        Requirements

        • Make sure there is at least 60% battery left on your smartphone before begin.
        • Make sure you have a custom recovery (TWRP/CWM) Install On your device. We recommend TWRP Recovery. Here is How to install
        • Now from TWRP Recovery =Take a proper Nandroid backup so that you can restore anytime you need.

        AOSP ROM download, install for Xiaomi mi 3 and mi 4

        Download 


        Download the right ROM according to your device’s name and model number

        HOW TO FLASH/INSTALL ANDROID 7.0 NOUGAT AOSP ROM ON Xiaomi Mi3 and Mi4

        • First, download all the files From the download section above
        • Now connect your device to the PC and transfer the ROM, Kernel and Gapps to the internal memory of your device (remember the location)
        • Now boot your device into recovery mode.
        • Now follow this guide to Flash Android 7.0 Nougat AOSP ROM On Xiaomi Mi3 and Mi4;  How To Install A Custom ROM Via Recovery On Any Android
        • Then Flash the Kernel (Same way as you flash the ROM)
        • After Flashing the ROM, now Flash the Gapps. [Guide]  How To Flash Gapps Using TWRP Recovery
        • Done!!! Now reboot your device from TWRP recovery (TWRP Recovery main menu >> Reboot System)
        • Your Xiaomi Mi3/Mi4  should be updated to Android 7.0 Nougat.
        via
        If you encounter any problem in the process, feel free to let us know via the comment box below

        If you dont want to miss any of our latest update you can subscribe here with your email address or you can follow us on facebook to get the latest updates about tech and more.
         

        Don't forget Share.